|
硬件:I/O 和传感器
|
感谢网友
弹力女超人 的翻译
硬件:I/O 和传感器
这部分包含了用户输入和输出的类,以及标准的NXT传感器。NXT的硬件包括一个输入键,一个液晶屏和一个用于输出的小喇叭。leJOS NXJ为这些硬件提供软件
LCD
LCD类没有实例(NXT上只有一个液晶屏),因此所有的办法都是静态的。它能够使用文字模式和图片模式。
LCD的文字模式
当用来显示文字时,NXT的液晶显示屏可显示8行16列。x,y的坐标方向如下图所示:
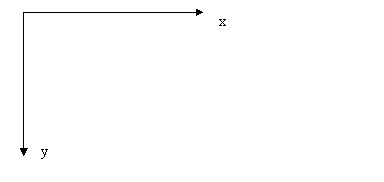
x的范围是从0-15,y的范围是0-7
向LCD中显示文字的方法有:
void drawString(String str, int x, int y) 它从指定的坐标(x,y)处开始显示一个字符串.
void drawInt(int i, int x, int y)
这个函数从(x,y)处显示一个整数,整数是从左边开始对齐的.
void drawInt(int i, int places, int x, int y)
这个drawInt函数显示一个固定长度的字符串,并且把数字右对齐放在字符串中。这意味着它总是占用了固定数量的字符位置。如果在一个循环中使用它,之前的数值总是会被完全覆盖
void clear() 清除显示内容.
示例:
import lejos.nxt.*;
import java.io.*;

public class LCDTest {
  public static void main(String[] args) throws Exception {
    LCD.drawString("Free RAM:", 0, 0);
    LCD.drawInt((int) System.getRuntime().freeMemory(), 6, 9, 0);
    Thread.sleep(2000);
  }
}
请注意,你也可以使用System.out.println(String str)来向LCD显示数据。它是按照行的顺序显示,当超出时就写入下一行直到底部。
另外,还需要注意,默认情况下,LCD的显示是自动刷新的。如果你需要控制它是否刷新,你可以使用LCD.setAutoRefresh(0) 来关闭自动刷新,或者使用LCD.refresh() 来重新启动刷新。
返回顶部
LCD图片模式
当显示图片的时候,LCD可以显示100*64像素。它同样可以按如图所示的坐标方向显示。
x的范围是从0-99,y的范围是0-63.
你可以使用graphics类来向LCD屏输出图片数据。这个类的位置是javax.microedition.lcdui
参见Graphics class API.
通过这个类,你可以画直线,矩形,圆弧和自定义像素的文字。
示例:
import javax.microedition.lcdui.Graphics;

public class GraphicsSample {

  public static void main(String [] options) throws Exception {
    Graphics g = new Graphics();
    g.drawLine(5,5,60,60);
    g.drawRect(62, 10, 25, 35);
    Thread.sleep(2000);
  }
}
下面是一组LCD类中向屏幕显示像素图片的方法。它们基本上和Graphics类相似,但是可以直接调用:
void drawString(String str,int x, int y, boolean invert)
这个drawString函数也是使用像素的方式来显示图片,但是它可以反射成黑底白字。
void drawChar(char c, int x, int y, boolean invert)
这个方法在坐标(x, y)处显示一个字符并且可以只对这个字符进行反射.
void setPixel(int rgbColor, int x, int y) 把(x,y)处的点设置成黑色或者白色,rgbColor等于1是设置它为黑色,等于0是恢复为白色.
返回顶部
按键
Button类有4个实例,通过静态方法访问:
- Button.ENTER
- Button.ESCAPE
- Button.LEFT
- Button.RIGHT
通过下面这个方法可以判断按键是否被按下:
示例:
import lejos.nxt.*;

public class ButtonPresses {
  public static void main(String[] args) throws Exception {
    while (true) {
      LCD.clear();
      if (Button.ENTER.isPressed()) LCD.drawString("ENTER", 0, 0);
      if (Button.ESCAPE.isPressed()) LCD.drawString("ESCAPE", 0, 0);
      if (Button.LEFT.isPressed()) LCD.drawString("LEFT", 0, 0);
      if (Button.RIGHT.isPressed()) LCD.drawString("RIGHT", 0, 0);
    }
  }
}
如果需要等待某一个按键被按下,然后松开,你可以使用下面这个方法:
示例:
import lejos.nxt.*;

public class ButtonTest
{
	public static void main (String[] args)
	throws Exception
	{
		Button.ENTER.waitForPressAndRelease();
		LCD.drawString("Finished", 3, 4);
		Thread.sleep(2000);
	}
}
如果要判断某个按键被按下,那么请使用:
button
ENTER LEFT
RIGHT ESCAPE
Code
1
2
4 8
如果我们要监听一个按键被按下时的触发事件,我们可以使用:
如果需要获取按键的当前状态,请使用:
返回顶部
声音
这个类只是简单的控制扬声器,它没有任何实例,因此它的方法全是静态的。
播放一种音调,可以使用
示例:
import lejos.nxt.*;

public class PlayTones {

     private static final short [] note = {2349,115, 0,5, 1760,165, 0,35};

     public static void main(String [] args) throws Exception {
        for(int i=0;i <note.length; i+=2) {
           short w = note[i+1];
           int n = note[i];
           if (n != 0) Sound.playTone(n, w*10);
           Thread.sleep(w*10);
        }
     }
  }
有两种方式来播放系统声音,第一种是:
参数code的含义是:
code = 0 Short beep
code = 1 Double beep
code = 2 Descending arpeggio
code = 3 Ascending arpeggio
code = 4 Long, low buzz
如果你记不住code 但又希望播放某种系统声音的话,你可以直接调用下列的系统函数:
这里还有一种方法,在播放声音的中间插入一段空白间隔,time的单位是毫秒
leJOS NXJ还有一个方法可以播放8位的wav音频文件:
这个函数会把音乐的长度以毫秒的量级返回,如果返回值小于0表示出错了。
如果要播放一个音乐片段,你可以使用:
void playNote(int[] inst,int freq, int len)
译者注:这段不明白:The inst array contains the attack,
decay, sustain and release parameters for the note. The
static constants for some predefined instruments are: FLUTE,
PIANO and XYLOPHONE. You can also experiment with defining you own.
返回顶部
电池
有两个静态方法可以获得电池的电压:
示例:
import lejos.nxt.*;

public class BatteryTest {
  public static void main(String[] args) throws Exception {
    LCD.drawString("Battery: " + Battery.getVoltage(), 0, 0);
    Thread.sleep(2000);
  }
}
返回顶部
传感器
NXT系列有4个传感器:触觉传感器,声音传感器,亮度传感器和超声波传感器。leJOS NXJ为这些传感器提供了软件支持,就像其他第三方供应商提供的一样
一个物理的传感器必须连接到一个端口,所以传感器的对象必须知道连接的是哪个端口。为了提供这个信息,当你创建一个传感器实例的时候,必须指定它的端口信息。指定方法为: SensorPort.S1, S2, S3 or S4.
触觉传感器
在使用触觉传感器之前,你必须使用下面的构造器来创建一个实例:
用下面的方式来判断触觉传感器是否被按下
示例:
import lejos.nxt.*;

public class TouchTest {
  public static void main(String[] args) throws Exception {
    TouchSensor touch = new TouchSensor(SensorPort.S1);

    while (!touch.isPressed() ;
    LCD.drawString("Finished", 3, 4);
  }
}
返回顶部
亮度传感器
在使用亮度传感器之前,你必须使用以下构造器来创建一个实例:
示例:
import lejos.nxt.*;

public class LightTest {
  public static void main(String[] args) throws Exception {
    LightSensor light = new LightSensor(SensorPort.S1);

    while (true) {
      LCD.drawInt(light.readValue(), 4, 0, 0);
      LCD.drawInt(light.readNormalizedValue(), 4, 0, 1);
      LCD.drawInt(SensorPort.S1.readRawValue(), 4, 0, 2);
      LCD.drawInt(SensorPort.S1.readValue(), 4, 0, 3);
    }
  }
}
返回顶部
声音传感器
声音传感器支持两种模式:DB和DBA。这些模式提供不同的频率响应,通过在不同模式间切换,来实现对不同频率声音的处理.
以下是两种构造方式:
SoundSensor(SensorPort port) 以DB模式创建一个声音传感器.
SoundSensor(SensorPort port, dba) 如果第二个参数是true的话,创建一个DBA模式的声音传感器 .
通过以下方式来切换模式:
只用DB模式的示例:
The above example gives a graphical display of the way the sound reading varies over a two-second period.
import lejos.nxt.*;

public class SoundScope {
  public static void main(String[] args) throws Exception {
    SoundSensor sound = new SoundSensor(SensorPort.S1);

    while (!Button.ESCAPE.isPressed()) {
      LCD.clear();
      for (int i = 0; i < 100; i++) {
        LCD.setPixel(1, i, 60 - (sound.readValue() / 2));
        Thread.sleep(20);
      }
    }
  }
}
返回顶部
超声波传感器
使用以下构造器来创建一个实例:
T这个传感器以两种模式运行:连续模式(默认)和ping模式。在连续模式下,传感器会尽量多的取得ping值,并把出现频率最高的值作为正确值返回
示例:
import lejos.nxt.*;

public class SonicTest {
  public static void main(String[] args) throws Exception {
    UltrasonicSensor sonic = new UltrasonicSensor(SensorPort.S1);

    while (!Button.ESCAPE.isPressed()) {
      LCD.clear();
      LCD.drawString(sonic.getVersion(), 0, 0);
      LCD.drawString(sonic.getProductID(), 0, 1);
      LCD.drawString(sonic.getSensorType(), 0, 2);
      LCD.drawInt(sonic.getDistance(), 0, 3);
    }
  }
}
在ping模式下,只用调用下面函数时,才会发送一个单独的ping指令
void ping() 这个方法把传感器设置成ping模式,并且发出一个单独的ping指令,最多8个响应会被获取到。这些响应会被下面这个函数读取。
int readDistances(int [] distances)
你提供一个整数的数组,当这个函数返回时,数组中会包含着返回的数据,在ping和获取距离的之间,大概需要20ms的时间。这个延时并不包含在这个方法中。所以在这个时间之前调用readDistances之前,可能会出现错误或者没有任何数据返回。正常的getDistances调用也可以使用ping返回第一个响应的数据。
int continuous()
编程:多个响应
写一段代码来显示一组多个响应的距离。这个程序需要调用4次ping方法,并且显示相应的4个结果,最后等待一个按键的按下。如果是escape按键的话,则退出这个程序。
答案看这里
返回顶部
|
|

