

|
|
|
Using Eclipse
|
Using Eclipse
Installing EclipseYou can download Eclipse from Eclipse downloads. If you are only going to use Eclipse for leJOS NXJ programs, you will only need standard Java development capabilities - you will not need a version that supports the Java Enterprise Edition or other languages such as C++ or Eclipse plugin development. A package such as "Eclipse IDE for Java Developers" is sufficient for leJOS NXJ. Make sure you download a package for your operating system. The examples in this section are for Microsoft Windows, but the installation process is similar for other operating systems. If you are using Linux, your distribution may have its own Eclipse package, which you may prefer to use. Unzip the package you downloaded to a folder. If you extract all files to C:\ then your Eclipse folder will be C:\eclipse. You can start Eclipse by running eclipse.exe from your Eclipse folder. You may want to put a shortcut to eclipse.exe on your desktop. When you first start Eclipse, you are asked to select a workspace: 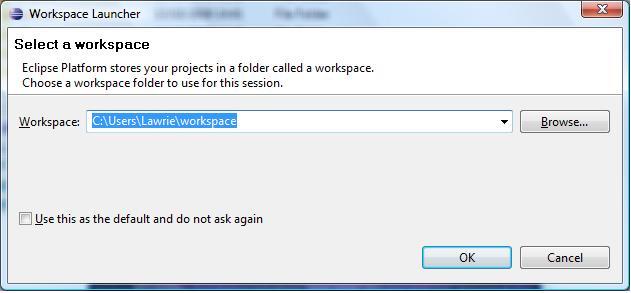
You can leave this as the default, or you can work with multiple workspaces and create one just for your leJOS projects. When you click OK, the IDE will open and you will see a welcome screen. You can close the Welcome window and start developing leJOS programs. The tutorial takes you through running the samples and PC samples that come with leJOS and then looks at an example project that uses an ant build file. It then shows you how to create your own project that uses an ant build file. If you are not interested in this and only want to use the Eclipse plugin, skip to Installing the Eclipse plugin. Back to topImporting the leJOS NXJ projects into EclipseYou should first import the leJOS projects into your Eclipse workspace. The easiest way to do this is to select File > Import... and then choose General > Existing Projects into Workspace. Browse to the folder where you installed the leJOS projects (e.g. C:\Users\Me\leJOSNXJProjects or C:\Documents and Settings\Me\leJOSNXJSettings), and select them all to import. Note that if you import the leJOS NXJ projects this way, the source does not get moved to the workspace, but stays in leJOSNXJProjects. You may prefer to copy your projects from leJOSNXJProjects into the Eclipse workspace and then import them by selecting the Eclipse workspace as the source folder. That way you have always got a clean copy of the leJOS NXJ projects and the Eclipse versions will not be uninstalled when you install a new version of leJOS. Back to topUsing the samples projectYou should then see several projects in your Package Explorer window including samples. Try exploring the samples project. You can open up folders by clicking on the expand/collapse toggles next to the folder name, and you can open files by double-clicking on file names. Try expanding the "BlueStats" folder, and its "default package" folder and opening BlueStats.java. You should see: 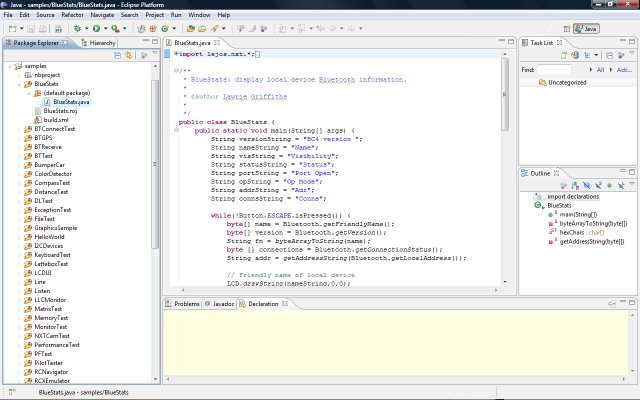
There is a source folder within the samples project for each sample. Each folder contains a build.xml file which is a build file for the sample written using "ant". Ant is a build system specially designed for Java - it comes bundled with Eclipse. There are other ways of building, uploading and running leJOS NXJ programs, such as using the leJOS Eclipse plugin, but the ant build files are easy to use, so we will start with them. Ant build files have different "targets". The default target for the sample build.xml files is "uploadandrun". This means that if you run the build.xml file it will compile the Java source, link it with the standard leJOS classes (classes.jar) to produce a binary file and then upload ad run the binary file. Turn on your NXT, make sure it is connected by USB or can be connected to via Bluetooth. Then right-click on the build.xml and select "Run As" and "Ant Build": 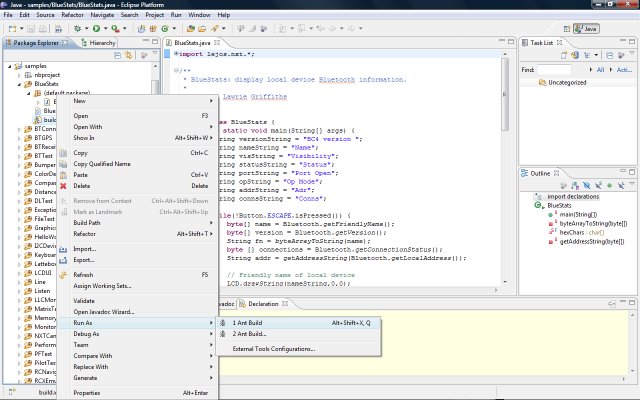
You should see output like the following in the Console window:
Buildfile: C:\Users\Lawrie\leJOSProjects\samples\BlueStats\build.xml
clean:
compile:
[javac] Compiling 1 source file to C:\Users\Lawrie\leJOSProjects\samples\BlueStats
link:
[java] Class 0: java.lang.Object
[java] Class 1: java.lang.Thread
[java] Class 2: java.lang.String
[java] Class 3: java.lang.Throwable
[java] Class 4: java.lang.Error
[java] Class 5: java.lang.OutOfMemoryError
[java] Class 6: java.lang.NoSuchMethodError
[java] Class 7: java.lang.StackOverflowError
[java] Class 8: java.lang.NullPointerException
[java] Class 9: java.lang.ClassCastException
...
[java] Class 38: lejos.nxt.Flash
[java] Method 0: Class: java.lang.Object Signature:
This verbose output from the leJOS linker tells you all the classes and methods that have been included in your program. It is very useful for debugging your programs. You should see the Bluetooth statistics on your NXT LCD screen. You can stop the BlueStats program by pressing the ESCAPE button on the NXT. You can browse through the samples and try them out. Some of the samples need to communicate with a program on the PC - see Using the PC samples project below. Other samples need specific sensors attached to the NXT or a robot with specific characteristics - such as a steerable wheeled vehicle. See the comments at the start of each of the Java files to understand the requirements of the sample. Note that the samples project uses default package names for simplicity. This is not good practice for Java programming so when we create our own project, we will use a proper package name. Note also that the samples project contains multiple programs each with a main method. This is convenient for showing lots of examples of leJOS NXJ programming in one project, but is not best practice. When we create our own projects, we will have a separate Eclipse project for each leJOS NXJ program Back to topUsing the PC samples projectIf you imported all the leJOS NXJ projects into your workspace, you should have a pcsamples project. Open it up and look at one of the samples such as BTSend. BTSend works with the BTReceive sample. BTSend.java runs on the PC and BTReceive.java runs on the NXT. There are no build files for the PC samples as they are not necessary. You can run BTSend.java by right-clicking on it and selecting, "Run as Java application", but first we need BTReceive running on the NXT. Go to the samples application, select the build.xml file for BTReceive, and run it (Run as Ant Build) to upload BTReceive to the NXT. Now go back to the pcsamples project and run BTSend.java. BTSend should now run and connect to BTReceive, send it 100 integers and display the values it gets back. BTReceive will then wait for another connection. You can use BTSend with the NXTReceive sample instead. NXTReceive is similar to BTReceive but it lets you choose which protocol and which mode you want to use to send data. You can look through the other PC samples and try them out in a similar way. Some of them are paired with NXT samples. Look at the comment at the start of the Java files. Some of them run a subset of the leJOS NXJ API on the PC using remote execution. AccelDemo, SensorTest and TachoCount are examples of this. TachoCount shows you how to control which NXT brick you connect to if you have multiple NXT bricks available. Back to topUsing the org.lejos.example projectThe org.lejos.example is a good example of how to create an Eclipse project for leJOS that uses an ant build file. 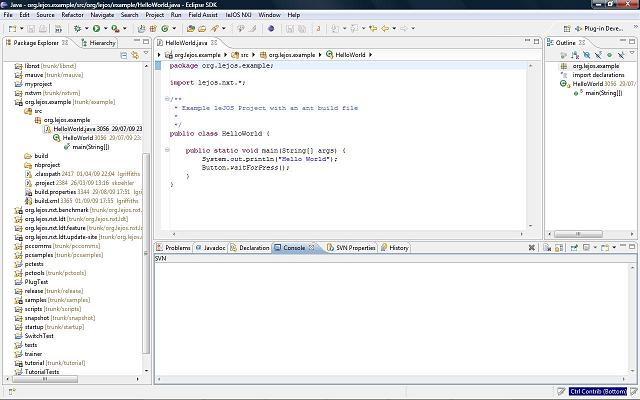
It is good practice to include the name of your organization in the project name to avoid name clashes with other projects in the work space. However if you are the only user of a project, this is not necessary. The project has a src directory that holds all the source packages. The example project has a single package: org.lejos.example. Again it is a good idea to follow the standard Java conventions for package names, but if you are not sharing the project with anyone, it is not necessary. The org.lejos.example has a single class file: HelloWorld. The project is built by the ant build file: build.xml. build.xml uses a properties file build.properties which has properties that give the name and location of all the leJOS jar files. The build.xml has ant targets for linking and uploading the leJOS binary. The default target is uploadandrun, which compiles the source, links the binary, uploads the binary and runs it Try right-clicking on build.xml and selecting "Ant Build". You should see the verbose output from the linker in the Eclipse console windows and the binary will be uploaded to the NXT and run. If you want to run a different ant target, right-click on build.xml and select "Ant Build ...". Back to topCreating your own projectThis section describes how to create a project that uses an ant build file. If you prefer to use the Eclipse plugin, skip to Installing the Eclipse plugin below. To create a project, select File > New > Java Project. Give the project a name, e.g. "org.me.myproject" and press Finish to accept all the defaults. You should now see "org.me.myproject" in the Package Explorer. You will need to add classes.jar to your project. To do this right-click on "org.me.myproject", select "Properties" and then "Java Build Path". Then select Libraries and then "Add external Jar". Browse for classes.jar in your NXJ installation and select it. As classes.jar replaces the standard Java run time library, you should remove it by selecting "JRE System Library" and clicking "Remove". You will now see classes.jar (and not JRE System Library) under "Referenced Libraries" in org.me.myproject. You should use a package name for your project. We will also call our package "org.me.mypackage". Select the "src" folder in org.me.myproject, right-click on it and select New > Package and type your package name. We now want to create main class.To do this, select the package you have just created, right-click on it and select New > Class. Type in the class name - we will use "HelloWorld". Select the "public static void main(String[] args)" option. You should now have a HelloWorld.java program containing: Edit the source so it reads: You will now need to build your project. One way to do this is to use an ant build file in the same way that the org.lejos.example project does. To do this, select a build.xml file from orglejos.example, right-click on it and select "Copy". Then go to the src directory, right-click on it and select "Paste". Do the same for build.properties Double-click on build.xml to edit it and change the name and description attributes. Then change the main.class property to the full name of your class: org.me.mypackage.HelloWorld The new line should read: <property name="main.class" value="org.me.mypackage.HelloWorld"/> You are now ready to upload and run your first leJOS NXJ project. This is done in the same way as for the samples: and org.lejos.example: by right-clicking on the build.xml file and selecting "Ant Build". Make sure your NXT is switched on. You should the verbose linker output in the Console window, and your program should be uploaded to the NXT and run. You should see "Hello World" on the NXT LCD screen. Press any key on the NXT to stop the program. Back to topInstalling the Eclipse pluginAn easier way to set up a project for leJOS is to use the Eclipse plugin. The plugin will automatically convert your projects to leJOS NXJ projects. To install the leJOS, click on the Help menu and select "Software Updates...". You should see the following screen: 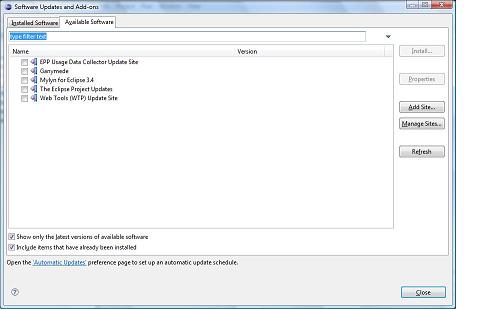
Select "Add Site..." and you will be prompted for the site name. Type "http://lejos.sourceforge.net/tools/eclipse/plugin/nxj/". 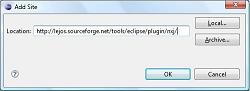
Click on OK and the site is added. Select the newly added site: 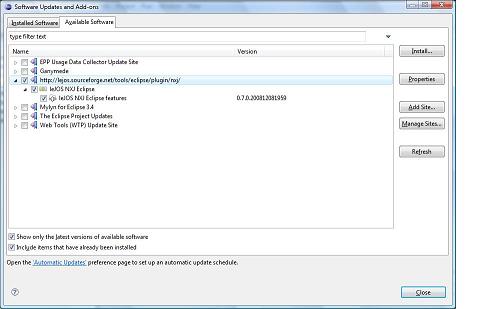
Click on install and Eclipse will check for dependencies and then prompt you to install the plugin: 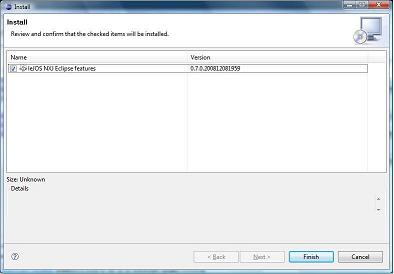
Click on "Finish" and the plugin will be installed. When it is finished, you will be prompted to restart Eclipse: 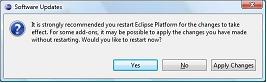
Click on "Yes" and Eclipse will restart. When Eclipse has restarted, you can read the plugin help by select clicking on the Help menu and selecting "Help Contents and then "leJOS NXJ". 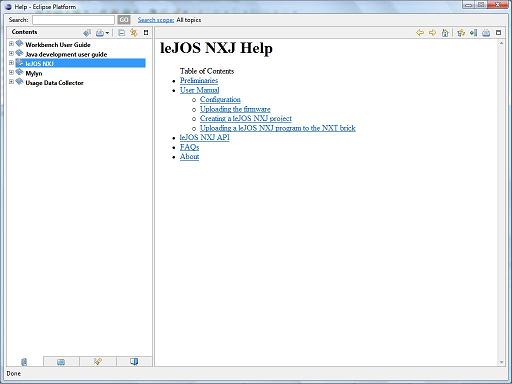
It is a good idea to read the help page to familiarize yourself with the plugin. To Configure the plugin for your system and preferences, click on the "Window" menu and select Preferences and then "leJOS NXJ". 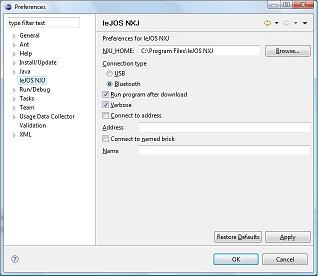
Browse to where you installed leJOS NXJ and select it as NXJ_HOME. Select any other options you require. It is a good idea to check the "Verbose" option. When you have set your preferences, click on "Apply" and then "OK". The plugin is now set up and ready to use. Using the Eclipse pluginYou can upload the leJOS NXJ firmware to your NXT from the plugin, by clicking on the "leJOS NXJ" menu item and selecting "Upload Firmware" or by clicking on the button on the toolbar. 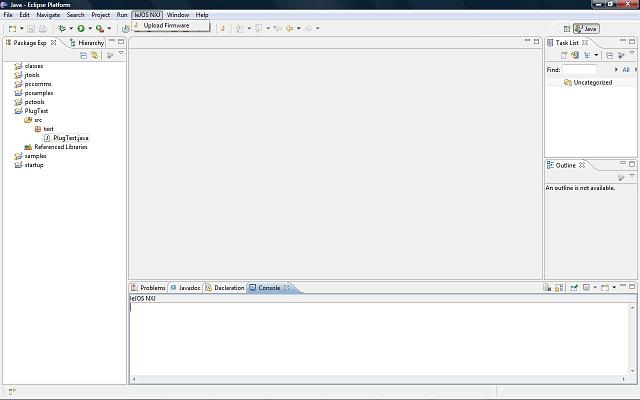
To create a new leJOS NXJ project using the plugin, create a Java project, by (for example) clicking on File and selecting "New" and then "Java Project". Give your project a name and accept the defaults for project creation. When your project has been created, right-click on it, and select "leJOS NXJ" and "Convert to leJOS NXJ Project". 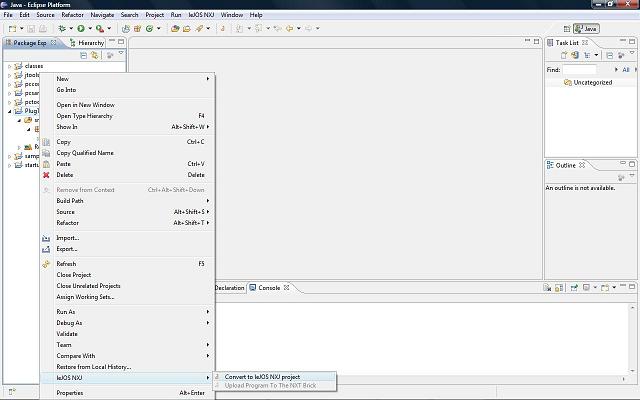
This will mark your project as a leJOS NXJ project and replace the JRE System Library with classes.jar from your NXJ_HOME installation. You can now add packages and classes to your project and build it in the normal way for Java projects (e.g. by setting the Build Automatically flag). When you are ready to upload your program to the brick, right-click on your main program and select "Upload Program to the NXT Brick". 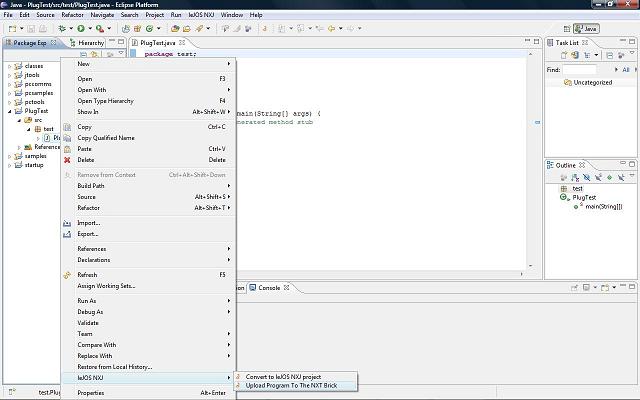
You will see output on a leJOS NXJ Console and a progress screen: 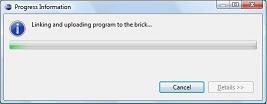
The upload will use USB or Bluetooth depending on which option you set on the leJOS NXJ Preferences page. You can change this and other preferences whenever you want. If you selected the "Run program after upload" option, the program will start running on your NXT when it has finished uploaing. Setting up the leJOS GUI ToolsleJOS NXJ comes with a set of GUI tools that can be using for flashing the firmware, exploring files on the NXT, monitoring and debugging programs on the NXT, downloading data logs, etc. It is useful to be able to run these tools within Eclipse, and to do this you need to set them up as external tools. To create external tools click on the down array next to the Run External Tools Icon on the toolbar and select "Extenal Tools Configuration": 
Then select Program and click on the New Launch Configuration button and you should see: 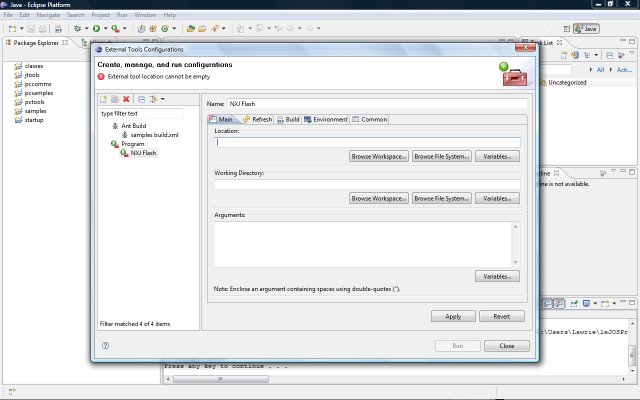
Type the name of your configuration, such as NXJ Flash and click on Browse File System and find the bin directory of where you installed leJOS NXJ and select nxjflash.bat. If you have multiple installations of leJOS you can go to the Environment tab and set NXJ_HOME to the one you wish to use. Other GUI tools you should set up include:
You may also want to set up command line tools such as:
|